Capturing NOAA images is fairly easy now after testing a few months in 2024 using different filters and antenna’s but the goal is for something a bit more stationary; this is where GOES-19 comes into play.
The biggest challenge I came across this adventure that is hardly mention on the internet anywhere is the dish alignment to GOES-19 and getting signal since the signal is very thin meaning the dish has to point at it precisely correctly or images and data will not be good. If you are like me, and not smart enough to use a physical compass or reading the compass or even knowing the azimuth, I will spare many of the despair of trying to get things up and running since I had help of AI when it came down to getting things up and running.
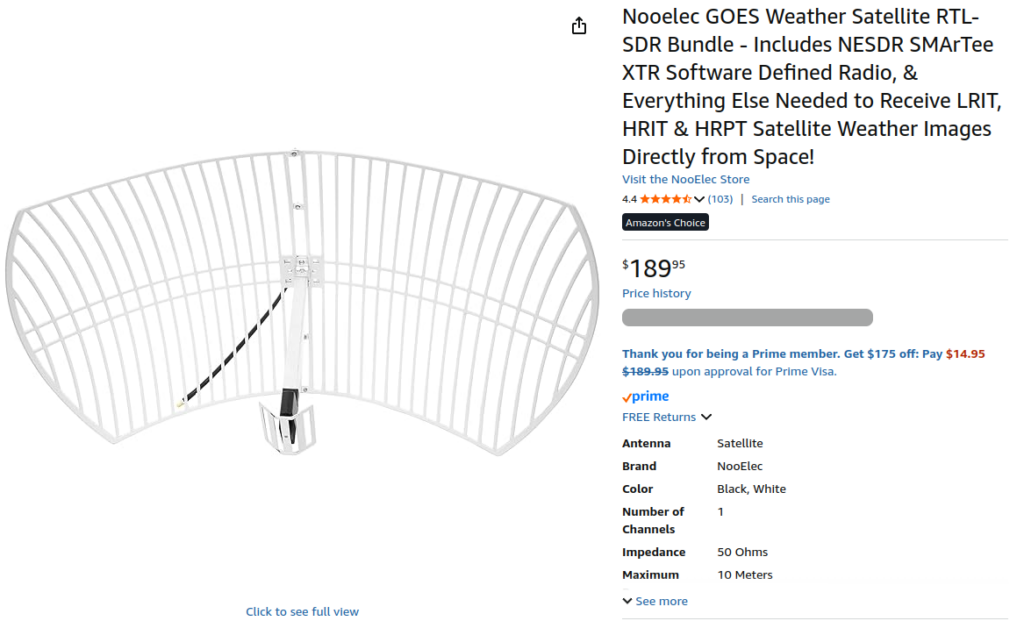
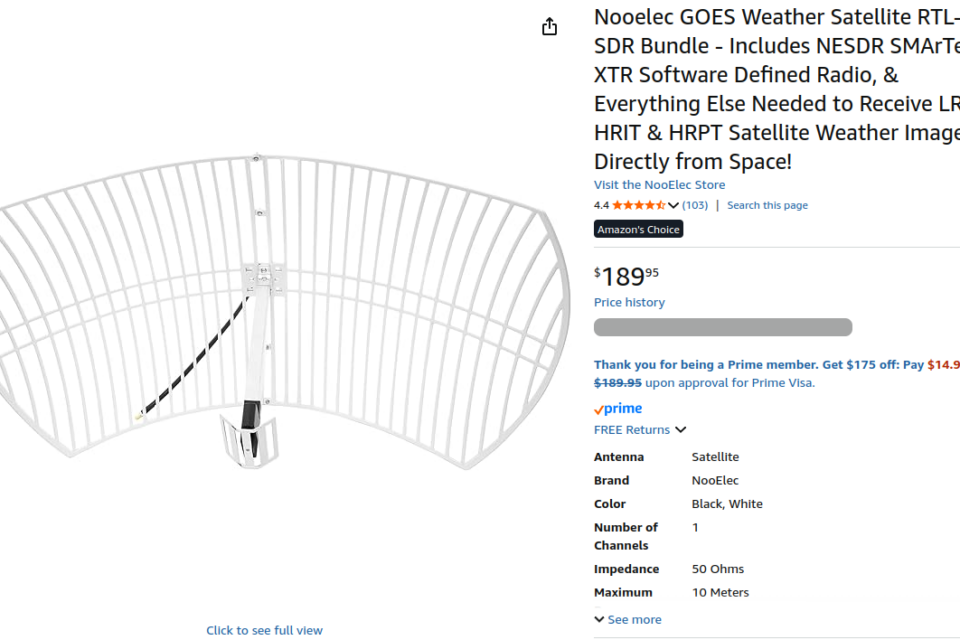
I Purchased the Nooelect GOES Satellite dish kit as it comes with everything needed including a SMArTee XTR v5ee. At the time of this purchase, I already had 3 different types of RTLSDR but one is used for weather data sent to NOAA and NWS, one for ADB-S feeding data to ADB-S exchange and the third one used for general usage.
It takes 30 minutes to setup the dish. During this process I highly recommend read https://usradioguy.com/goes-satellite-imagery-reception/#Setting_up and https://github.com/darkiron71/GOES-SATELLITE-IMAGES-RASPBERRYPI as these tutorials will build the framework once you start.
In almost all websites and social networking the use of raspberry PI is mentioned – I use Linux Mint Cinnamon 22.3 therefore I will not mention anything regarding the usage of PI and finding anything working with regular Linux is almost non-existent!
Position your Sat Dish to the GOES that is closest to you whether it be GOES 18 OR GOES 19. I strongly urge everyone to use https://www.dishpointer.com/ as this was the most accurate information I have found. Using phone apps will leave a margin of 5-15 degrees of error!
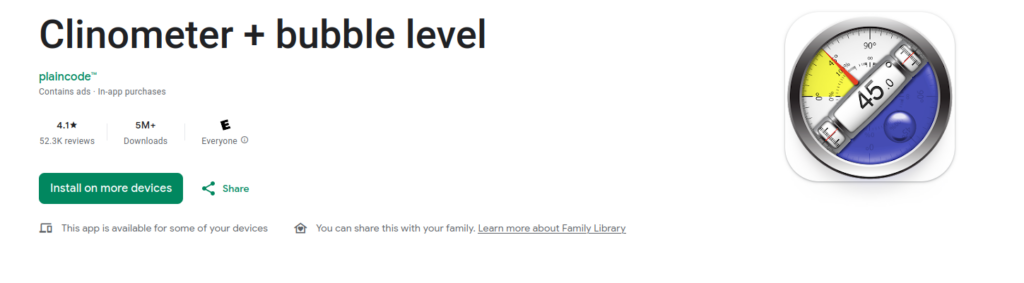
I spent hours with many different AR dish pointing apps and confirm none of them do not work for many different reason. The only app useful in pointing the dish to GOES is an clinometer when searching for the level and elevation.
Now the fun part. Goestools needs to be installed even if you are going to use Satdump to decode GOES signals, Goestools will help determine the satellite signal strength needed > https://github.com/pietern/goestools
I advise anyone to follow https://usradioguy.com/programming-a-pi-for-goestools/ as this will have the basics of getting setup.
Start with installing the dependencies:
sudo apt-get install -y \
  build-essential \
  cmake \
  git-core \
  libopencv-dev \
  libproj-dev \
  zlib1g-dev \
  librtlsdr-dev
Proceed to build goestools:
git clone --recursive https://github.com/pietern/goestools
cd goestools
mkdir build
cd build
cmake .. -DCMAKE_INSTALL_PREFIX=/usr/local
make
make install
Any errors will be cmake related, you may install if any errors shows. Any additional information can be found here – https://usradioguy.com/programming-a-pi-for-goestools/
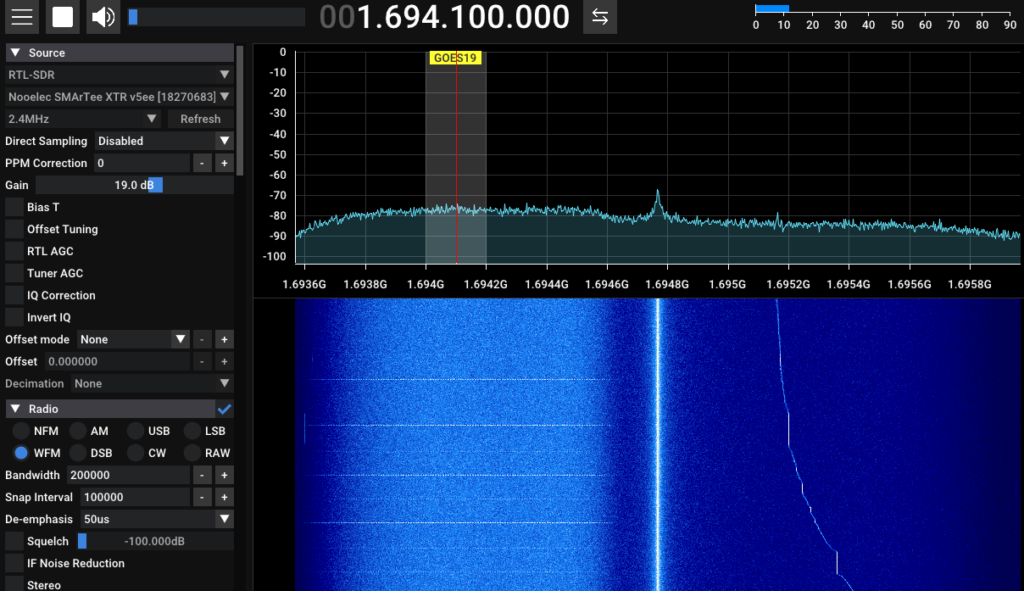
At this point if you have the dish aligned with GOES you should see something similar in your SDR app of choice but you do want to confirm the signal strength using goestools. First configure your configuration file before proceeding. This would be located via “/home/UserName/goestools“.
By default, the goesrecv.conf will use your RTLSDR device index 0 by default. If you have many RTLSDR plugged in like I have, I ran into so much issues that I experimented until I knew exactly what was going on. I was unable to find any resources available and AI was literally useless.
Find the RTLSDR device you want to use by running this in terminal:
rtl_testThe results should be something similar to this:
  Found 3 device(s):
  0:  RTLSDRBlog, Blog V4, SN: 00000001
  1:  Realtek, RTL2838UHIDIR, SN: 00043300
  2:  Nooelec, SMArTee XTR v5ee, SN: 18270683


Using device 0: Generic RTL2832U OEM
Found Rafael Micro R828D tuner
RTL-SDR Blog V4 Detected
Open your file manager of choice to /home/UserName/goestools and open goesrecv.conf in your text editor and edit the device_index that you need to use with the goestools. Also change true/false on bias tee if your RTLSDR of your choice uses this or if it is constantly on Save changes.
Your goesrecv.conf should look similar:
[demodulator]
## Use LRIT mode for GOES-15.
# mode = "lrit"
## Use HRIT mode for GOES-16 or later.
mode = "hrit"
source = "rtlsdr"

# The section below configures the sample source to use.
#
# You can leave them commented out to use the default values for the
# demodulator mode you choose ("lrit" or "hrit"). To use and configure
# any of them, uncomment the section below, and change the demodulator
# source field to match the source you want to use.
#

[rtlsdr]
frequency = 1694100000
sample_rate = 2400000
gain = 0
bias_tee = false
device_index = 0

[costas]
max_deviation = 200e3

[clock_recovery.sample_publisher]
bind = "tcp://0.0.0.0:5002"
send_buffer = 2097152

[quantization.soft_bit_publisher]
bind = "tcp://0.0.0.0:5001"
send_buffer = 1048576

[decoder.packet_publisher]
bind = "tcp://0.0.0.0:5004"
send_buffer = 1048576

# The demodulator stats publisher sends a JSON object that describes
# the state of the demodulator (gain, frequency correction, samples
# per symbol), for every block of samples.
[demodulator.stats_publisher]
bind = "tcp://0.0.0.0:6001"

# The decoder stats publisher sends a JSON object for every packet it
# decodes (Viterbi corrections, Reed-Solomon corrections, etc.).
[decoder.stats_publisher]
bind = "tcp://0.0.0.0:6002"

# The monitor can log aggregated stats (counters, gauges, and
# histograms) to a statsd daemon. Because this uses UDP, you can keep
# this enabled even if you haven't setup a statsd daemon yet.
[monitor]
statsd_address = "udp4://localhost:8125"
You are ready to test your alignment!
In terminal, use command:
goesrecv -v -i 1 -c ~/goesrecv.confor
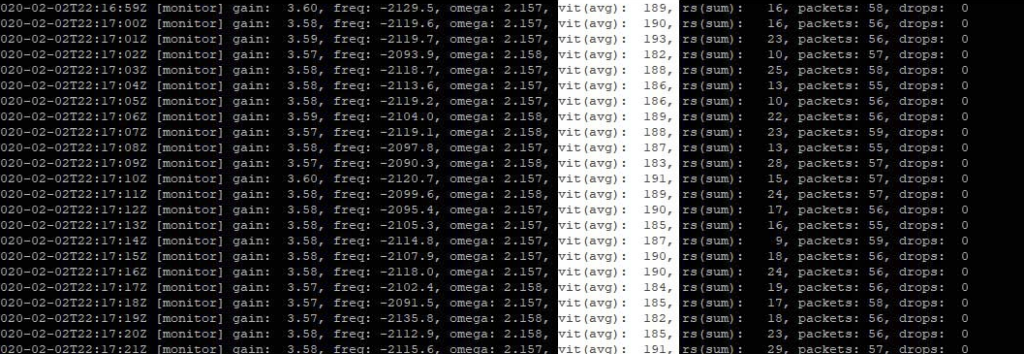
goesrecv -v -i 1 -c ~/goestools/goesrecv.confNOTE: the number does not indicate the index number of your RTLSDR device. It always has to be 1. Any other number will produce errors or a broken modulation in goestools!
Anything below 300 vit(avg) indicates a locked signal but single digits is better quality.
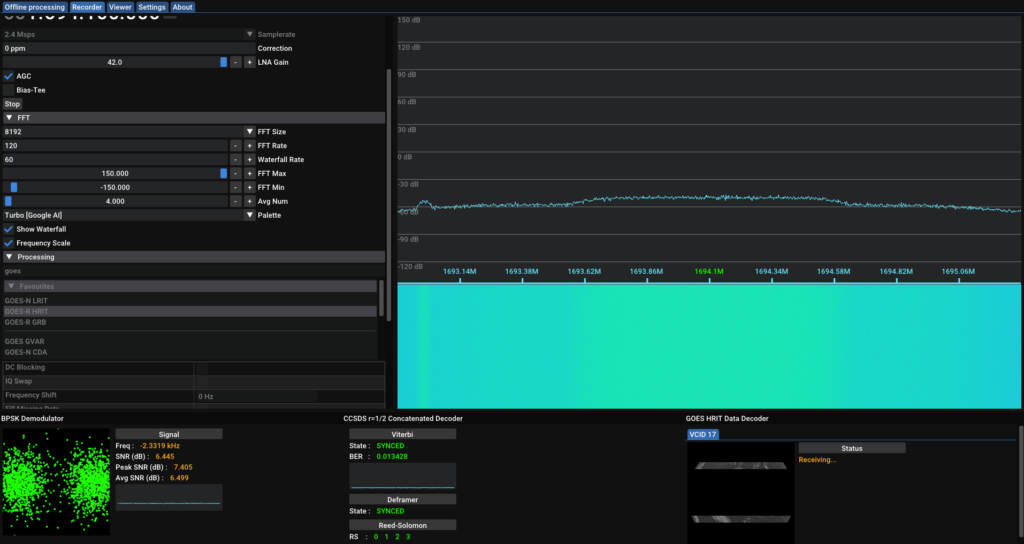
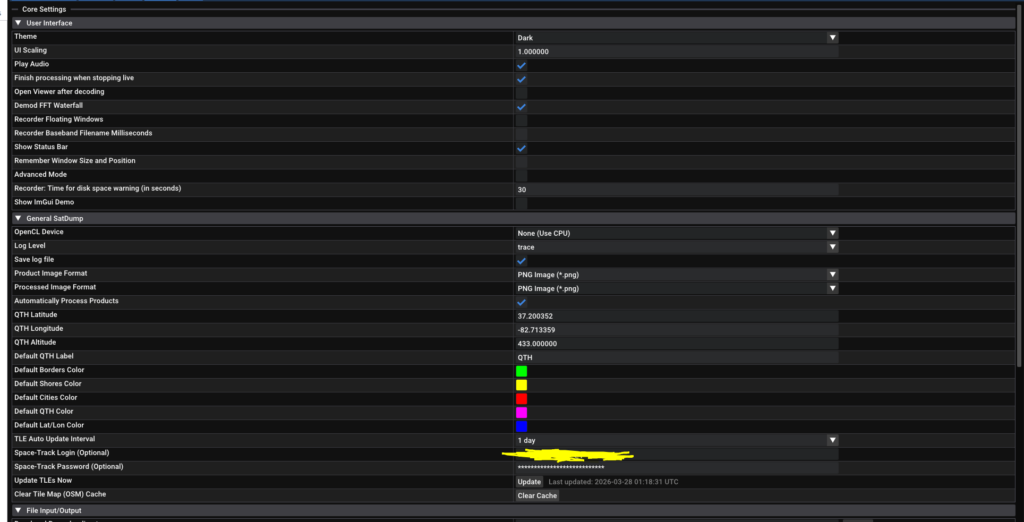
Now you are ready for Satdump! There is a few different types of ways and tutorials of jumping straight away but download Satdump if you have not already from here – https://www.satdump.org/download/ and open it up. Go settings and setup the General SatDump and File Input/Output settings.
Switch to Recorder and set your device, frequency, and gain. Start to see if it is working and you are seeing the waterfall with the signal you was getting with Goestools. If all looks good, switch to Processing and choose your pipeline. For example, I chose GOES-R HRIT. If you have the device still on, proceed with clicking “start” on the processing. If you clicked start and ended just testing the signal, you can not start processing until the Recorder is started first. This is called “live processing” and I recommend waiting at least 15 minutes for data to shiw up in your designated output folder.


This post was made with images and testing goestools with vit average 76. There is also other guides on using SatDump command line or Windows version. I suggest looking at https://usradioguy.com/receiving-goes-hrit-with-satdump/ for additional information.
This post was created with the lack of tutorial on with regular linux computers as most tutorials on the internet consist of instructions written for Raspberry Pi.